Showing posts with label sewing. Show all posts

Saturday, January 11, 2014

ginger high-waist panties - a 2014 goal completed!

To quote Gertie of Gertie's Blog for Better Sewing:
"...what's not easy about sewing undies is photographing them. Unless they're the tiniest of knickers, they look weird and huge in pictures. And then you go into this shame spiral of wondering why you're showing your underwear on the internet anyway."  
http://www.blogforbettersewing.com/2012/08/detour-into-panty-land.html

She's totally right! But, here I am anyway, posting my weird, huge undies on the web... because the truth is I'm actually pretty proud of myself for making functional panties!  And I completed a 2014 goal!

I used the Ginger Bodysuit & Separates PDF pattern by Ohhh Lulu. (You can also buy her designs RTW here. They are gorgeous!) She includes some tutorials on her website which is helpful. I did have a hard time getting all the lines to line up when assembling the PDF pattern pages together. In fact, I never quite got it and had to re-draw a few spots, but the fit didn't seem to be altered by it.
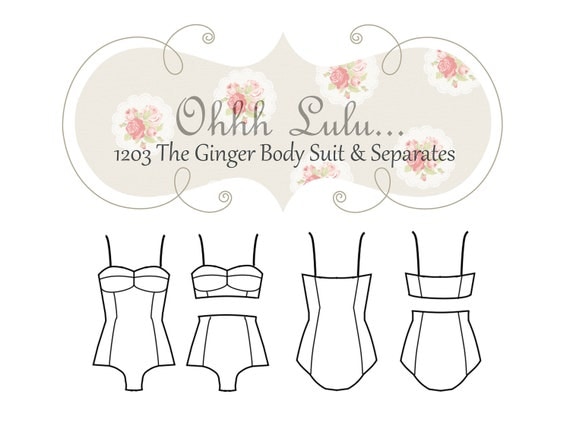
Ohhh Lulu The Ginger Body Suit and Separates PDF Sewing Pattern


I used some leftover cranberry jersey from Mr. Sew Rachel's Christmas pajamas (it's really soft and thick!) and a thin, very stretchy white knit with a little heart pattern. All the seams were constructed on the serger, with the lingerie elastic sewn on with a zig-zag stitch on my regular sewing machine. I found out that you need to use a fairly wide zig-zag, as I only used a narrow one at first and totally ripped the stitching getting them over my hips, thus having to unpick and resew it.

Are they perfect? No. But they fit! And hold together! And They will be very comfortable under dresses, higher-waist skirts and leggings, which is exactly why I wanted to make them in the first place! And I can use what I learned on this pair to make the next even better! Speaking of that, next time I may try making the center panel out of a woven fabric cut on the bias. Maybe something silky and floral. But that's for another day...

Sunday, December 15, 2013

a present to me, from me! - a sewaholic renfrew christmas sweater


Who can resist purple reindeer sweaterknit?!?! I think it was from Joann's last winter, and I loved it then, but not the price, especially since I was so new to sewing and my success rate was still not too high. Then this summer it moved over to the clearance rack, which then was 50% off the clearance price, and it was finally mine!  I knew right then that a Sewaholic Renfrew Christmas sweater was in my future!


And here it is! I enjoyed Tasia's pattern. She has you construct it a little differently than most top patters, and it comes together really well. I only made a few alterations right at the end. I took the bottom band in 3-4 inches. Her patterns are designed for pear-shaped ladies, which I am definitely not! I also had to shorten the sleeves quite a bit (and could have more, but didn't want to cut off any reindeers!), and took in the cuff so the sleeves would stay up when scrunched to 3/4 length. The smaller band and cuffs gave it more of a sweatshirt shape and I totally dig that for this sweater, but if I were to make this pattern as a regular jersey t-shirt I would grade down the hips and arms to get a slimmer fit.

I did a fairly good job matching up my stripes, only a few spot got askew. The cuffs were supposed to have a band of purple right after the stitching, but that got lost during construction, but I made sure to line up the facing-together reindeer to the center of the bodice front and back. 


And check out that awesome neck binding! I carefully cut my strip from the fabric to make the patterned band, lined it up nearly perfect, and attached and top-stitched with a nice, even zig-zag. Next time I will cut the band just a wee bit smaller as it gapes ever so slightly, most of which I was able to combat with a good steaming. I constructed everything on my regular sewing machine with a slight zig-zag stitch, then finished the seams on the serger. I'm doing most of my sewing this way right now, not quite yet trusting my mastery of the machine to do my seams right on the serger.

And now "'tis the season" to be busy, so there may not be a post again until after the 25th. In the meantime, Happy Holidays and Merry Christmas to all! Whatever you celebrations may be, I hope they are merry and bright!

Tuesday, November 12, 2013

my new inspiration wall!

Maybe you caught a glimpse of it in my last post. We finally hung up my large cork board in my sewing room! It's 3'x5', and I'm so excited to have this space to pin up fabrics and patterns as the projects form themselves in my mind. Then when feeling the need for sewing inspiration, I can grab a pattern with the desired fabric swatch together. Does that mean I'll no longer get distracted by other fabrics and patterns? Absolutely not! But a little idea organization can't be a bad thing!


Monday, November 11, 2013

what to do with wool?

You know how sometimes you buy a piece of fabric that you love so much that you just can't decided what to do with it? I've got that right now, and could use a little guidance.

I have this super soft, lovely, wool blend. It's fairly lightweight, like a densely woven but thin flannel.


I LOVE IT! And I want to wear it this season. But because I love it so much, and paid a little bit more than i usually do, I'm feeling all this internal pressure to make something that I will not only love as much, but will get regular wear in my wardrobe.

My first thought was a high waist circle skirt, to just below the knee. It would have a vintage vibe that could be dressed up, but would it be too dressy for everyday? Sometimes you just don't know until you intruduce it into your wardrobe!  I would pattern it off this dressy Modcloth.com skirt that I own and love for fall special occasions:


http://www.modcloth.com/shop/skirts/songs-by-the-fire-skirt
Worried that it might be too dressy for real life (although, maybe I could tottally rock it day to day.... I don't know!), I thought, "what about a midi A-line? Or one with a smidge of flair? Or knee-length slim skirt?"

 
Slim or A-line? I used this pattern for my slim, lace print skirt.

Maybe view C?


But then I started to think about a cozy, casual top for fall/winter. The weight could be perfect for a flannal-type button-up. I've never made a button-up blouse before, so that's a little intimidating. Would it be tricky to fit to my petite frame? Maybe this fabric would be light enough for Butterick 5826, which I previously made in a lightweight rayon that fit fabulous with very little alterations!


And then I started thinking about my new navy knit dress and how much I love to wear it with tights. Maybe I should make a cozy dress to wear with tights! I know, your thinking, "but look at all the trouble your having with your grey dress." Should I really start another dress? I may not have it finished until spring OR may run into the same frustrating fit issues! But how cute would these dressed be in cozy purple wool?


Look! "VERY EASY" It can't be that bad...


Maybe I could use the same pattern that I drafted for this three-hour dress, already altered and fitting?
So, really, what should I do with my wool? HELP!


Wednesday, October 23, 2013

fast sewing & slow sewing

First off... NO ONE ENTERED MY GIVEAWAY!  :(  A friend mentioned that maybe all of you readers were sewing admirers, but not sewists yourself. That got me wondering... how many of my readers sew? Let me know below if you'd care to share. And now... on to the sewing!

First: fast sewing!

This week I was making a costume for a friend that was totally kicking my butt! It was an easy design, but I was going without a pattern and using these awful-to-sew-with costume fabrics; slippery metallics and inexpensive sheers. I needed a quick sewing pick-me-up after that!


Enter the slouchy, lacy t-shirt! Kimono sleeves, simple banded cuff and neck binding, 4 pattern pieces and 11 total lines of stitching, mostly done on my serger. It took me about a hour from start to finish, a perfect palette cleanser after the gold and sheer orange monstrosity! (Which actually came out just fine and my friend was super pleased....)


I used New Look 6216, view B with the cuffed sleeve for a little extra length. I forget how much I like New Look patterns. They always seem to have simple, stylish designs that are easy to make your own, and are always affordable. 


This was my first time installing a narrow band for the neckline on the serger (and probably only my 2nd or 3rd time doing this finish on any machine!). I didn't do a great job. The band width ended up very uneven, but It was a good learning experience and doesn't bother me enough to not wear the shirt. I also made the pattern size I measure at, which is actually a size or two bigger than what I usually make, so it's nice and slouchy! For solid, everyday t-shirts I'd make a smaller size. 

Now the slow sewing...


Inspired by a pin on pinterest.com, I'm making McCalls 6503, view D in a woven, grey, linen-like fabric (not sure the fabric content, probably a synthetic or synthetic blend) that I picked up for free from my mom's stash! I got the pattern on sale at Joann Fabrics and only had to buy thread, buttons, and a zipper, so the whole dress is costing me under $6! On this project I'm really taking my time to practice good technique; hand basting the placket, pressing each step, finishing every seam. So far I have most of the bodice constructed and it's looking very nice! Setting sleeves will take a little time because I have very narrow shoulders, but I'm giving myself that time to pay close attention, working on it a hour or two at a time.

AND let myself take a break from this dress to whip out a fast project whenever I have the need to make something quick!


Wednesday, October 16, 2013

a three-hour dress


I had originally bought this mid-weight sweater knit fabric for... well exactly that; a sweater! But as I've been discovering more and more about my own personal style through sewing, I realized that a blue and while heart print cardigan just didn't fit into my wardrobe. When I found this image on pinterest.com, I knew exactly what that fabric needed to be:
Fall love
image from queenofoz.blogspot.com
I started with this Simplicity Sew Simple pattern I picked up for $.97, and I say started with because the end result was much different!


I made a wearable-muslin-of-sorts of this pattern straight from the envelope for my Halloween bee costume, since a costume doesn't have to bee a perfect fit. (Get it? I'm so funny!) It's a simple pullover dress, front piece cut on the fold with bust darts, back piece has two pieces with a slight flare on the back center seam. Trying that on I was able to figure out what kind of alterations I wanted to do to my paper pattern for the blue and white heart dress:


I folded up an inch between the bust and arm opening (and the same to the back pattern piece), taking care of my petite bodice and high bust-point in one swoop! Then I threw (swung? whatever the term is...) the bust dart so that in angled towards my waist for a little more waist definition. 


The original pattern came with little short sleeves, so I lengthened them to hit just as my elbow and added and little cuff/slit/I don't quite know what you call it. 

You can't quite see it, but there are two perfect back darts!
I took in a little more than an inch from the center back, which also straightened the center seam so I could cut the back on the fold and eliminate the back center seam. After stitching up the side seams I decided to add some back darts, too, for just a little more shape. I just stole those right off another dress pattern in my stash! And to finish it all off, I made facings for the neckline instead of a narrow hem or band.

It felt so good to put into practice these flat pattern altering techniques I'd picked up in places like the Sew the Perfect Fit with Lynda Maynard class I took on Craftsy.com, and the A Perfect Fit book!  I'm pretty pleased with myself! I feel a little like Carolyn from Diary of a Sewing Fanatic, who can slash and alter her TNT dress pattern into pretty much anything she can think of!

I used my sewing machine with a slight zig-zag stitch for darts, sleeve construction and setting, sewing in the neckline facings, and top-stitching on the neckline and hem, then used my serger for the side seams, finishing the armhole seams and neckline facing, and finishing the raw edge on the bottom hem so that I only had to fold up and stitch once, reducing bulk. The coolest part? From the time I started pattern alterations to finished garment took only about three hours! I got to wear it out that evening with leggings and boots... super cute. There may be more of these dresses in my future!


Thursday, October 3, 2013

problems with pleather...

 ...kinda like trouble with tribbles.
image from http://www.treknews.net/tag/science/
But seriously, my last purse project involved a little bit of a learning curve with working with pleather. I thought I would share some of my findings in that they might be helpful for you.

1.) The top thread kept breaking as I was sewing along. My first thought was to change the thread. I was using a brand I don't usually use in my sewing machine, and I know she can be fussy about thread brands. BUT after I switched to gutermann thread it was still breaking. So I loosened up the thread tension on the machine and that helped some. I also decided the switch to a larger needle.

2.) When top-stitching, the pleather would stick to the foot and not move along. Big gobs of thread, so frustrating! I had read that you can reduce the friction by sandwiching tissue paper between the pleather and the sewing foot, and also between the pleather and the feed dogs. It was amazing the immediate difference the tissue paper made! I'd read that this trick works with slippery fabrics, too, but this was the first time I'd tried this trick. One tip I'd add is to use a thicker tissue paper is possible, as it tore away from the stitching cleaner. (With some of my cheaper tissue I had to pull all these little specks out form the stitching with tweezers... no fun!) One downside is that it made it harder to see the material to sew my top-stitching perfectly straight and lined up. But slightly less straight top-stitching is better than no top-stitching at all!

3.) And I didn't come to this conclusion until after I'd finished my project, but next time I'll use a longer stitch length.  I normally just toot right along at the 2 setting on my machine for most sewing needs. I noticed some of the plastic coating on the pleather was "flecking" off in between the stitching so that tiny spots of the fabric underside showed through. It's quite tiny, and probably I'm the only one who'll notice so I'm not going to remake the whole thing... but I suspect a longer stitch length would minimize that "flecking." 

4.) Speaking of stitching, don't forget to sew carefully, because unpicking wrong seams will still leave visible little holes in the pleather! 

I certainly learned a lot about working with this material. I hope this was helpful, so that when you pick up a pleather project your learning curve isn't quite so steep!

Sunday, September 22, 2013

a yellow, linen, picnic blanket skirt!

First off, CHECK OUT MY NEW BLOG BADGE! ------------->

And second, I made Tilly and the Button's Picnic Blanket Skirt!


I'd been pining after a mustard yellow skirt for a couple seasons (even though yellow is usually NOT my color), pinned some inspiration photos on pinterest.com, then spied some yellow linen on sale at Joann's a few months back and took the plunge! I originally planned on making a pleated, paper-bag waist skirt using the Adventures in Dressmaking tutorial, but eventually concluded that a paper-bag waist may not quite be the most flattering look for me. I'd been wearing my Gertie Gathered Skirt a lot, so decided to try Tilly's skirt which had a similar silhouette.


I made only a few changes from Tilly's design. Her's calls for cutting one rectangle for the skirt back, and two rectangles for the front, once stitched becoming a long piece roughly 2.1x your hip measurement. I had two yards of fabric, and my hips measurement is 38", so I decided instead to cut just my fabric lengthwise for the entire skirt piece putting me at just under Tilly's recommended measurement BUT a seamless piece. That did mean I had to omit the side pockets since there were no longer side seams. In retrospect, I wish I had dealt with the extra two seams to have had those pockets.

I also didn't include the interfacing in the waistband, but not on purpose! As I was moving along I thought to myself, "weird how she doesn't put interfacing in the waistband..." Actually, she does tell you to do that in an earlier step that I obviously wasn't paying enough attention too! It's totally wearable (I've already worn it on more than one occasion in fact!), but it would lay a lot nicer with the interfacing.


Another thing I will do differently in the future involves the placement of the buttons. I put the first one on the waistband then  the rest evenly 3" apart, but the skirt likes to pull apart that section where the waistband meets the skirt. Interfacing may have helped with that as well, but in the future I will start with the waistband button, then a button directly below the waistband AND THEN start with spacing them 3" apart.

On the plus, the linen was lovely to work with! It held a nice crease when creating the plackets, and it was just nice to work with a simple woven again. Remember how I needed to re-learn to use the automatic buttonhole foot on my mom's (now mine) machine? It turns out most of the feet she gave me don't actually go with the machine, including the buttonhole foot! I know it had a buttonhole foot so next time I'm there I will search for it, but in the mean time I FREE-HANDED THE BUTTON HOLES AND THEY CAME OUT AWESOME! (Can you tell I'm a little proud?)

 And topped it all off with lovely brass buttons. :)

Lastly, here is my mother-in-law's cat that kept photo-bombing my photo shoot. Until later!

Friday, May 24, 2013

they're here! they're here!

My indie patterns arrived! And early! I only ordered them from Sweet Little Chickadee on May 22nd, and according to the USPS tracking they were scheduled to arrive on May 28th, but they're here!


I opened the mailing envelope to find everything beautifully packaged! Of course, I was so excited to get into the patterns that I didn't take the time to take a picture. Oh well, next time. And after this package, there will SO BE A NEXT TIME.


The patterns were wrapped in blue tissue paper and twine, and on top was her business card in a little fabric pouch with a few pieces of CANDY (which I ate.... so no pictures, either)! How nice?

This is my first experience buying independently produced patterns, so I'll show you what I found in the blue tissue. Here are my two new Sewaholic patterns:


Inside looks very much like a traditional pattern printed on tissue paper with a large folded instruction sheet. I already have fabric picked out for these!

Now I've seen a few Megan Nielsen makes on other blogs and, to be honest, haven't been overly excited about them, especially for a $20 pattern. I decided to try her new Eucalypt Tank Pattern because I had been searching for just this kind of simple tank pattern that would give me lots of options for summer staples, and a lot of sewers seam (get it?) to love her patterns. Now that I've got my hand on one, I can see why. First off, the opening of the envelope is on the long side and has a Velcro closure to make it easier to store the pattern.


And once you open it up, you find a full glossy booklet of instructions and pattern variations!


And the pattern pieces are printed on nice, heavy, white paper, something that will really hold up to being traced and used over and over again. It's so beautifully produced and packaged that I just have to make it, like immediately! Maybe I'm seeing what all the hub-bub is about!

Like I said, I will be ordering from Sweet Little Chickadee again! She had a great selection of patterns from many different designers, including Australian and UK designers like Sewaholic and Megan Nielsen, but because she's US based it means quick shipping, no international conversion credit card fees, or extra taxes for this US chick! Check them out!


Thursday, May 23, 2013

me-made-may '13 - may 19th - 23rd

Still going strong!

On May 21st I wore my slim, lace print skirt to work with a black t-shirt and purple-y cardigan. This was one of my earlier makes, and wearing it again this week I can see how far I've come in my sewing skills in just a few months! The fit isn't quite right and the zipper is sewn a little bit bumpy. But the print camouflages most of that so it still look good and I'll wear it again!


I wore my new McCalls 6751 and I love this fabric! I paired it with skinny jeans and a red cardigan.  As I mentioned in a previous post, I  have to wear a black cami under so that my bra doesn't show with the deep V int ha back. BUT I'VE ALSO DISCOVERED that the straps like to slide off my shoulder... another reason for the cami! 

Saturday, May 18, 2013

me-made-may '13 - may 14th -18th

Here is my MMM '13 update! I'm doing really well, and finding it easier than I expected to reach for my me-made items when putting an outfit together. It's totally reaffirming my decision to dedicate so much of my free time to making my own garments.

Everyone at work loved my new Butterick 5885 on May 14th! Still too early to go sleeveless, and I was having a hard time figuring out what color cardigan would go with this graphic print. I decided on fuchsia... because fuchsia really goes with everything this season!

I wore my new maxi skirt on May 15th AND 16th. This is SO going to be a summer staple! I've already planned another maxi skirt fro my next project. Given how many times I've work this since just a week ago when I made it, you will be relieved to know that it launders beautifully. :)

On May 17th I wore the purple lace fold-over waistband skirt out shopping with my sister and mom. I dressed it casual with gold flip flops, a white t-shirt and a slouchy, grey sweater. So cute! 
Until later! 

Thursday, May 16, 2013

a bright casual mccalls 6751 for summer

I saw this fabric and knew I needed it! The colors, the print, the softness, the drape! The questions was, what to make? Mr. Sew Rachel thought I should make a maxi-skirt, and while I do love my maxi-skirts, I really wanted a top. But, with a large print like this it had to be a pattern without a lot of pieces and seams, and large enough to really show the print off without overwhelming my small frame. I decided to try a new McCalls pattern, M6751 view D.


It's not that l'm crazy for the butt flap trend this season, but it needed a little something to avoid being just a boxy top. After looking at the finished garment measurements I decided to cut a size smaller. 6+ extra inches in the bust? That's too loose for me. Even so, the shoulder straps lay a little too wide, which I'm finding is the case with most patterns on my frame.
M6751
Back view D
Back view of my finished top.
The back is designed to be made from one pattern piece, cutting two so they mirror each other. I thought, "how silly to waste such beautiful fabric by having a double layer over the butt flap. It isn't even seen!" So I cut the bottom piece to just under where they overlap, and then had enough scrap for a cool infinity scarf! Wrong move. Once I had it on, the way the "V" in the back draped revealed the bottom edge of the under-layer, and a big ugly opening! I had to top stitch the two pieces together along the top hemline about 6 inches from the side seam to prevent the gaping. It's mostly invisible, but now the back "V" doesn't drape nearly so lovely. What did I learn? Next time follow the instructions because they are probably that way for a reason.


Speaking of instructions, I discovered a fabulous little nugget of information tucked in the M6751 instructions! The options for finishing the neckline, armholes, and hem were bias tape or a narrow hem. I wasn't so pleased with bias tape when I used it for the top I made for my sister, so I thought I try my hand at a narrow hem and discovered THIS:


Why had I not seen this before?!?! What a great way to ease in a curved hemline, and even with the straight hems that extra line of stitching made for a great guild-line! Remember how in the last post I stated how much I hate hemming? Well I still think it's tedious and fussy, but at least I now have a tool that makes it a little easier and lead to better results!