Showing posts with label pants. Show all posts

Saturday, June 7, 2014

the quest for real pants


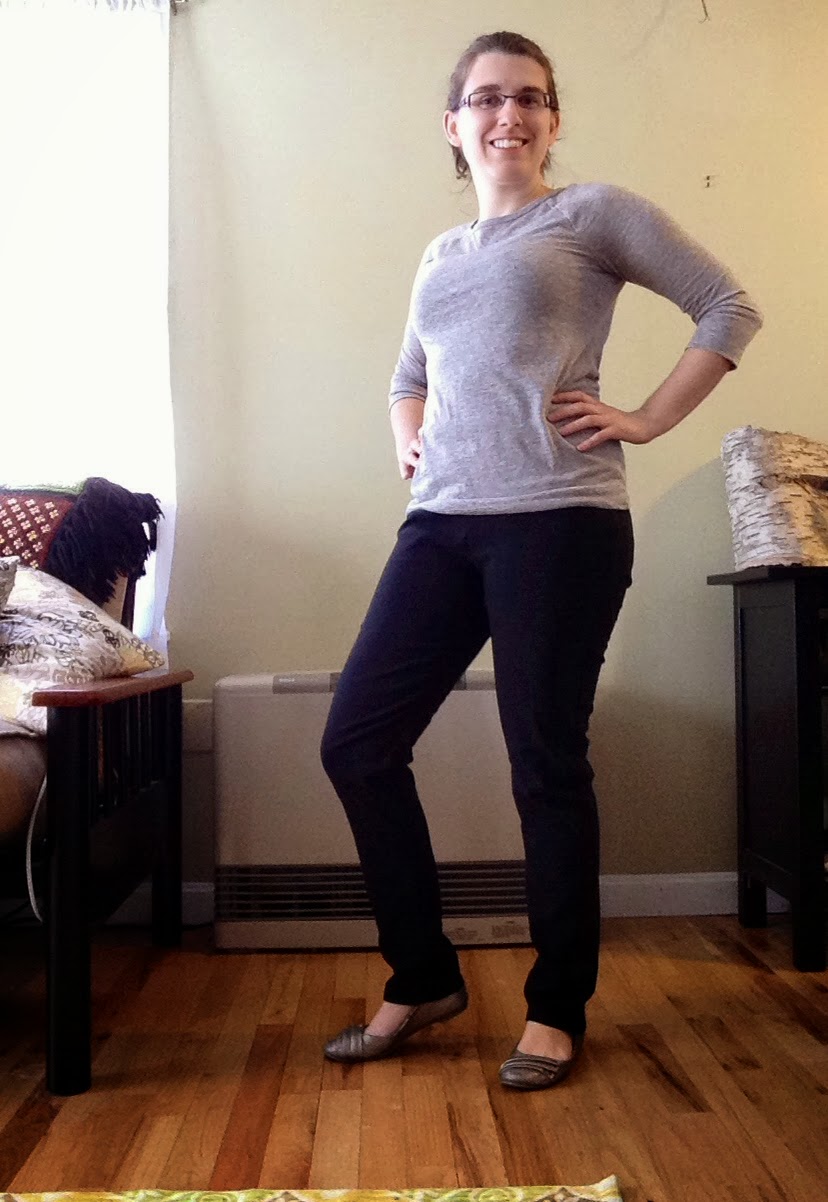
While I've had some good success with the Elle Pants... I felt I really needed to make some real pants, with a fly and pockets. So for the last month I've been working on and off on Simplicity 1969 Amazing Fit Pants, and finally have something to show you.

I used a mid-heavyweight khaki with a fair amount of stretch that came from my mom's stash. The fit actually looks much better in these pictures then how I feel they look (and feel) in real life. I worked really hard on these and in some areas they look really nice, like the pocket construction and the "carriers" (aka belt-loops... didn't know that when I started!). I tapered the legs in even more (even though it's a "slim pant" pattern) to try and get a more modern look. The pattern is designed to be worn 1 1/2" below the waist, which I learned was too high especially on my short frame. At this point I'd already inserted the fly, and there was no way I was ripping that out again after the number of attempts I made to get it in! I was able to lower the front rise by a little over and inch when I attached the waistband. Unfortunately that wasn't enough, and I had to rip out the crotch seams to be able to take in another 3/4" from the front rise there... probably not the correct way to go about that.

backside looks good!


The rise still feels too high in the front, and the waistband ended up a little too big so they like creep... no, rapidly settle to a more natural, lower pants position on my body. All the previous pictures are with a belt to hold them up, and there still feels like a lot of extra fabric in the front. And if you take the belt off:


I don't know if you can tell... but the crotch seam of the pants is, like, 3 inches from it's anatomical counterpart. And it's uncomfortable as they move all around (and down!) with every little movement I make. And apparently I can't sit down at all:

AHHHHH!

And that picture is with the belt! After reading a pants post by notes from a mad housewife, I tried scooping out (and down) the back center curve and that seems to help a little with the extra fabric in the front. Should I have also scooped the front curve as well? Or added more crotch depth before I even started? Part of the problem with pants is than I'm not even sure how to diagnose the fit problems, so I then can address them more properly. Any thoughts or experience with this issue? Since the fabric has stretch, would it be beneficial to stitch in some firm ribbon to keep the waistband from stretching? (Even though I did use some interfacing.) 

So overall... with a belt these could be acceptable pants when business casual is required... as long as I don't sit down. If I try this pattern again I'll lower the rise even more before inserting the fly, or maybe look at the SBCC Manhattan Trousers, which is already designed for a shorter rise. Or just make more Elle Pants:

http://sewrachel.blogspot.com/2014/02/i-made-pants.html

Sunday, March 16, 2014

elle pants disappointment


So frustrated! I was making up another pair of StyleARC's Elle Pants to wear to work, since my last pair came out so well. This time I was using a grey bengaline, bought from Joann.com, with a similar stretch as my black pair. Inspired by Gillian of Crafting a Rainbow, I added back pockets to this pair. (Check out her amazing pink pair she just posted!)

But first the good...

They came together super quick this time around thanks to a little tip from Handmade Jane! Since I only have white serger thread, and threading the machine can be a pain, I have been sewing seams once on the regualr sewing machine with matching thread then finishing the raw edged on the serger. With Jane's tip I can cut out that first pass on the sewing machine! She points out that you actually only need to change one thread on the serger to match your fabric, since only one thread with actually show on the outside! Changing the first thread is way easier than the whole upper and lower loops anyway, and I just threaded it with a regular spool to match my project. Great!

And the waistband came together with no fuss at all this time around, and lays beautifully. I was feeling so good about how they were coming together!!!

The pockets are adequate, but not perfect. They ended up a little lower than they should but overall they are O.K.

Now the bad...

THEY ARE TOO TIGHT! So frustrated! The last pair fit so nice, maybe even a little ease to spare, and I don't think I did anything different this time that would have affected the sizing. Even the fabric had near similar stretch! A whole afternoon (and $20 in fabric) wasted for nothing, not even learning anything since I have no idea why they don't fit... and I really, really needed another pair of pants for work.

AND THERE'S MORE! I broke a serger needle. It's been a while since they'd been changed so no big deal... except I changed it and the new needle immeadiatly broke (and it's kinda scary when that needle goes!). Maybe I didn't tighen the screw enough... but then the third one snapped too! Mr. Sew Rachel thinks the tension must be off, but I swear it's not. So not only do I not have any pants, but I'm unable to use my serger and can't figure out why.

Sigh. I'm not sure what the goal is with sharing this discouragement. I guess we all have bad sewing days and sewing failures, I just usually can take some socalce in knowing I've learned something in the process. Maybe some time and reflection will help.

Sunday, February 16, 2014

i made pants!

Hear that?

That's the sound of me crossing off another 2014 sewing goal! I made pants! Real pants! Wear-outside-the-house pants! And they fit!

And I got a self-timer app for my new iPhone!
Per the suggestion of Gillian of Crafting a Rainbow, I used StyleARC's Elle Pants pattern. I even splurged to get a yard and a half of the suggested stretch bengaline fabric shipped over from Australia, to ensure the best possible conditions for pants-making success.


stretch bengaline fabric in black  
Gillian was right! The pants are super easy to sew up with just three pattern pieces, no fly, buttons, or pockets. Good thing too, because I found the accompanying instructions be be more than a little confusing. BUT, I will say that Chloe of StyleARC is quick and fabulous at responding to construction questions via e-mail!
She writes about Elle Pants: "This is the pant of the moment, slim line from ankle to waistline. Elastic waist 35mm or 1 ¼ inch wide. These pants sit so beautifully without any bulk, wear them with your high heels out for the night or with your sneakers for brunch.....a must have piece in your wardrobe!"

It's hard to evaluate and adjust the fit during construction, as you really can't get a feel for the fit until the waistband it on. Still, before adding the waistband I did adjust(scoop out) the crotch by about 1/4 inch, and lowered the front about 1.5 inches so that the waistband would lay perpendicular on my body, accommodating for my fuller bum. But once I had the waistband attached and I could really judge the fit, I'm not sure those adjustments were actually necessary.

After attaching the waistband I was able to narrow the legs on the outside seam by about an inch from the top of the hip all the way down. I'm very pleased with how well the legs fit, and how easy the adjustment was! I also ended up only having to shorten the pants 2.5 inches!


Something very cool and thoughtful was how StyleARC includes little care tags with their fabric to add to your finished garment, just like RTW.  No need to ruin your handmade garment because you forgot the fabric care!

Overall, I now have a great pants pattern the fits! While the instructions leave something to be desired... I enjoyed using the StyleARC pattern and will use them again (in fact, have another in the works currently!). The patterns are printed on nice, thick paper that will hold up to a lot of use, and I know if I ever have questions Chloe will respond promptly. The stretch bengaline was worth every penny. It sewed up very nicely with the right amount of weight, structure and stretch, making a great pair of stylish black pants for work! My one complaint is that they have that ever-so-slight snowpants sound when I walk. You know the sound I'm talking about...  Now that I've made a successful pair maybe I can explore some other fabric choices that would preform the same, without the little annoying "swishy" sound.


Wednesday, January 1, 2014

top 5 of 2013 - part 3: goals for the new year

Top 5 of 2013 - An Annual Blog Series 


Today's Top 5 of 2013 is Goals for the New Year, and what would be a more appropriate day to post it than today?  I've come so far in my sewing skills in 2013, but still have more I can learn!

#1 - Pants

This means real, wearable-outside-of-the-house pants. Not pajama pants. Leggings would be great to make, but the goal is actual pants. I attempted McCalls 6707 last February.... which ended in a ball of fabric and pins in my sewing drawer.  Gillian of Crafting a Rainbow suggested I try pants from the Austrailian pattern company styleARC. Gillian has made a lot of great versions of the Elle pant (check her makes out!), so I'm leaning towards that pattern for my 2014 pants goal, and may even splurge for the shipping on the suggested Stretch Bengaline fabric.

Stylish slim line stretch woven pant elastic waist pant
http://www.stylearc.com.au/stylearc/index.php?page=shop.product_details&flypage=flypage.tpl&product_id=404&category_id=2&keyword=elle&option=com_virtuemart&Itemid=42
stretch bengaline fabric in black
http://www.stylearc.com.au/stylearc/index.php?page=shop.product_details&category_id=31&flypage=flypage.tpl&product_id=587&option=com_virtuemart&Itemid=47
#2 - Swimsuit

I've made a bikini a number of years ago using Kwik Sew 3330. I love the flirty mid-rise bottoms... but alas, I'm not quite comfortable in a bikini at the moment. 
K3330
I loved seeing everyone's Bombshell Swimsuit by Closet Case Files, but prefer a more traditional bottom so I'm making a Bombshell-inspired tankini! I'd planned on making this last summer, and already have the fabric and made a mock-up of the top using Kwik Sew 3761. This year, it's so happening!
K3761

#3 - Underwear

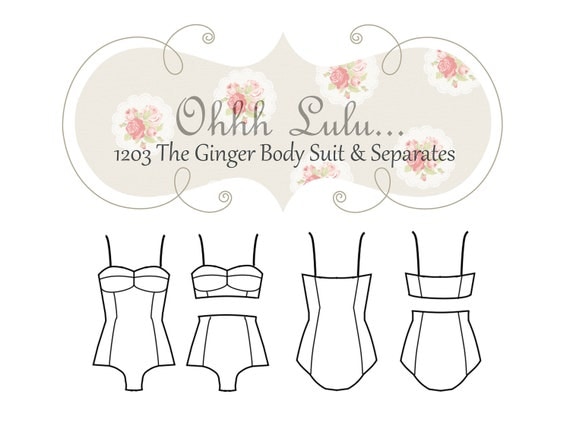
I've attempted the free pattern from So Zo.. What do you know?, with not yet great success. But what I really want to make are The Ginger Body Suit and Separates by Ohhh Lulu. I need some fabulous foundations for my 2014 makes!

Ohhh Lulu The Ginger Body Suit and Separates PDF Sewing Pattern

#4 - Coat/Jacket

I have yet to decided what pattern to make, but I WILL be making a coat or jack for Winter 2014/2015. (Want some inspiration? Check out this awesome tailored coat by Male Pattern Boldness.)

#5 - While I'd love to use my last goal for making an amazing Sewaholic Cambie Dress (which I WILL make, and I have a feeling will become my new go-to dress pattern), I instead want to use this spot to make a goal to teach. I have had a few folks that have expressed interest in learning, and I know I am a great teacher, so in 2014 I'm going to be offering some informal 1-on-1 sewing lessons. I'm really excited about this possibility (and at the very least it will encourage me to keep my sewing room fairly neat)!

So.. what are some of your 2014 goals? 

Friday, May 24, 2013

they're here! they're here!

My indie patterns arrived! And early! I only ordered them from Sweet Little Chickadee on May 22nd, and according to the USPS tracking they were scheduled to arrive on May 28th, but they're here!


I opened the mailing envelope to find everything beautifully packaged! Of course, I was so excited to get into the patterns that I didn't take the time to take a picture. Oh well, next time. And after this package, there will SO BE A NEXT TIME.


The patterns were wrapped in blue tissue paper and twine, and on top was her business card in a little fabric pouch with a few pieces of CANDY (which I ate.... so no pictures, either)! How nice?

This is my first experience buying independently produced patterns, so I'll show you what I found in the blue tissue. Here are my two new Sewaholic patterns:


Inside looks very much like a traditional pattern printed on tissue paper with a large folded instruction sheet. I already have fabric picked out for these!

Now I've seen a few Megan Nielsen makes on other blogs and, to be honest, haven't been overly excited about them, especially for a $20 pattern. I decided to try her new Eucalypt Tank Pattern because I had been searching for just this kind of simple tank pattern that would give me lots of options for summer staples, and a lot of sewers seam (get it?) to love her patterns. Now that I've got my hand on one, I can see why. First off, the opening of the envelope is on the long side and has a Velcro closure to make it easier to store the pattern.


And once you open it up, you find a full glossy booklet of instructions and pattern variations!


And the pattern pieces are printed on nice, heavy, white paper, something that will really hold up to being traced and used over and over again. It's so beautifully produced and packaged that I just have to make it, like immediately! Maybe I'm seeing what all the hub-bub is about!

Like I said, I will be ordering from Sweet Little Chickadee again! She had a great selection of patterns from many different designers, including Australian and UK designers like Sewaholic and Megan Nielsen, but because she's US based it means quick shipping, no international conversion credit card fees, or extra taxes for this US chick! Check them out!