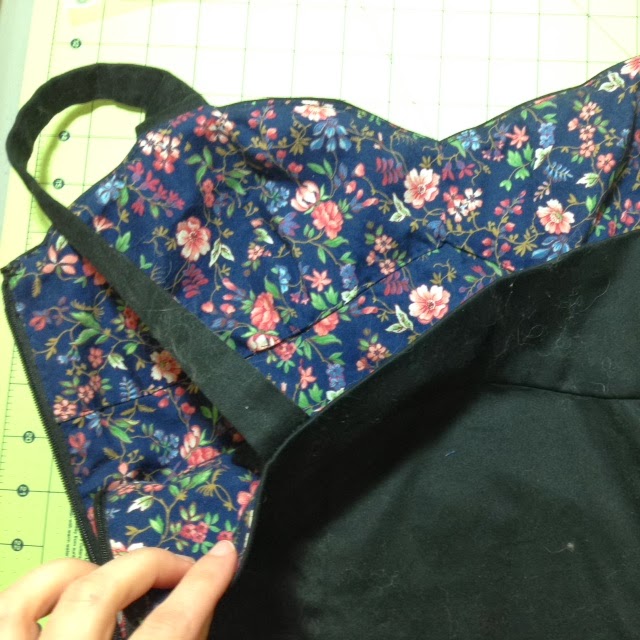
I want to thank you for your kind words in reply to my last post. After I hit "Publish" I thought... maybe it's not smart to blog angry. But I think its sometimes important for us bloggers to share our failures as much as our successes.
After a little thought, I think I may I found my pants fitting problem. In the original pair, I had taken in the side seams to get the perfect fit, so on my current pair I did the same. Now that I've had a little time to cool off and about it... I realize that I may have had already altered my paper pattern to reflect that alteration, and therefore ended up taking the seam in twice on my grey pair. No wonder they are too tight! So I've swallowed my pride, put on my big girl panties and ordered another 2 yards of the same grey fabric to try again. I'll get a perfect pair out of this failure after all!
My serger is still sitting without an installed needle. I have recently had it oiled, cleaned and tuned, and didn't have any issues until after I had re-threaded it with serger thread, but this is the first time changing the needle. It was my mother's machine, so I may ask her for advice. Maybe I have the wrong needle, or am installing it wrong. I'll let you know what I discover, but right now I'm still a little mad at it and am ignoring it.
So here is a little "thank you" from me to all you in the amazing, supportive sewing blog community: Parfait and Filbert in a basket! You all rock!
Monday, March 17, 2014
Sunday, March 16, 2014
elle pants disappointment
So frustrated! I was making up another pair of StyleARC's Elle Pants to wear to work, since my last pair came out so well. This time I was using a grey bengaline, bought from Joann.com, with a similar stretch as my black pair. Inspired by Gillian of Crafting a Rainbow, I added back pockets to this pair. (Check out her amazing pink pair she just posted!)
But first the good...
They came together super quick this time around thanks to a little tip from Handmade Jane! Since I only have white serger thread, and threading the machine can be a pain, I have been sewing seams once on the regualr sewing machine with matching thread then finishing the raw edged on the serger. With Jane's tip I can cut out that first pass on the sewing machine! She points out that you actually only need to change one thread on the serger to match your fabric, since only one thread with actually show on the outside! Changing the first thread is way easier than the whole upper and lower loops anyway, and I just threaded it with a regular spool to match my project. Great!
And the waistband came together with no fuss at all this time around, and lays beautifully. I was feeling so good about how they were coming together!!!
The pockets are adequate, but not perfect. They ended up a little lower than they should but overall they are O.K.
Now the bad...
THEY ARE TOO TIGHT! So frustrated! The last pair fit so nice, maybe even a little ease to spare, and I don't think I did anything different this time that would have affected the sizing. Even the fabric had near similar stretch! A whole afternoon (and $20 in fabric) wasted for nothing, not even learning anything since I have no idea why they don't fit... and I really, really needed another pair of pants for work.
AND THERE'S MORE! I broke a serger needle. It's been a while since they'd been changed so no big deal... except I changed it and the new needle immeadiatly broke (and it's kinda scary when that needle goes!). Maybe I didn't tighen the screw enough... but then the third one snapped too! Mr. Sew Rachel thinks the tension must be off, but I swear it's not. So not only do I not have any pants, but I'm unable to use my serger and can't figure out why.
Sigh. I'm not sure what the goal is with sharing this discouragement. I guess we all have bad sewing days and sewing failures, I just usually can take some socalce in knowing I've learned something in the process. Maybe some time and reflection will help.
a stylearc marie jacket
I'd hinted a few posts back that I had another StyleARC pattern in the works, and here it is! The Marie Jacket! I still need to hem the sleeves but wanted to show your right away.
| Looks like I installed my zipper on the wrong side... oh well! |
![]() |
| source: http://www.stylearc.com.au/stylearc/index.php?page=shop.product_details&product_id=523&option=com_virtuemart&Itemid=47 |
Other bloggers have also noticed that the jacket has much more of a hi-low hem that the illustration suggests, and it's very long. More on that later...
I used a really lovely, fairly thick, heathered charcoal grey knit from Joann Fabrics. I love this fabric! It has a metallic thread throughout, and washed, cut and sewed beautifully. The pattern calls for a snap to hold up the cowl when zipped, but I decided to try a magnetic clasp originally sold for handbags. It's a little heavier, but I think a fun detail. I was inspired by the same closure in my sister's Modcloth Jacket... in fact her jacket inspired the whole make!
| I love the back seaming. I could see it done with an insteresting contrast... leather shoulder detail maybe? |
| Could use a little more back shaping... and sooooo long! |
When first constructed it was too big overall, so I re-set each sleeve taking out 1 1/4", took in just shy on an inch on each side seam and 1/4" in the sleeves. Still, after all that work it just wasn't very flattering.
| Apparently my body no longer has a shape... well, I guess a pudgy rectangle is shape. |
One, it's really long. That's not a surprise for me. The hi-low hits unflattering in the front, and completely covers my butt, and not in a cute show-it-off way. The cowl ended up bulky, with four layers when zipped of that nice, thick jersey. Even after taking things in, it doesn't fit snugly on my shoulders or waist, instead choosing to enphasize that pudgy ring between my bellybutton and lack-of-hips all the way around. (Yes, I am implying that my jacket has a mind of it's own and is choosing to hug my unflattering bits...) And maybe it's just overall too much fabric for my small frame. So I see two options, send it to my sister (same measurments, but 7" taller and a great hoursglass shape), or shorten to a bomber-style length. At that length, I would be cutting it off above the area it unflatteringly hugs, the rest of the jacket having about the same amount of ease.
| Sorry the picture it so dark! I've tucked the hem under to my hip level, where my hands are. I should have work lighter jeans! |
So what should I do? Send the longer hi-low version to my sister, or alter it to a shorter bomber jacket?
Monday, March 10, 2014
finished by hand london georgia dress!
FINALLY! I finished my By Hand London Georgia dress! I'm so proud
that I stuck with it and produced something that fits! Ok... so not
perfect... but pretty darn close!
Then I hemmed by first turning up once and stitching on the machine, then up again and finished with a newly learned hand stitch, a narrow herringbone stitch!
| Getting all the pet hair off the black sateen took almost as long as making the dress! |
After my last posts on bodice fitting,
the rest was fairly straight-forward, although time consuming. I was
having a hard time fitting the skirt myself while it was on me, so last
weekend I drove up to my parent's house to have my mom help. Once there,
we had it pretty much fitted in minutes! I ended up only needing to
take in on the two back seams. I took out a little scoop to fit the
curve on my back, snugged it up around the bum, took in a little more
under that to hug the bottom off that curve, and about 1" from each of
two seams (four inches from the total circumference) from that point
straight down to the hem for a slimmer skirt. I ended up taking in
between 1/4"-1" on pretty much the whole length of each seam.
| Oops! Bra strap slip! |
I
decided to fully line my Georgia with the same pretty, floral cotton I
used from my test garments (in fact, it is my altered test garment!),
because I wasn't sure the best way to finished all those curved and
clipped seams. It definitely makes the dress fell more substantial and
warmer should I choose to wear it to a winter function, but next time I
probably won't do that as it made the dress feel a little more bulky and
curves sit a little less smooth (of course, that last part could just a
less-than perfect seam on the part of the sewist).
| And the pet hair has returned.... |
For
the rest of the construction I broke everything up into little bits
that could be completed in the evenings after work. I attached the skirt
and finalized the fitting one evening, and instead of testing fate
after that I walked away. Another night I altered and installed the
skirt lining, then walked away. Another night I installed the invisible
zipper perfectly, then you guessed it, walked away.
| Check out that perfectly installed invisible zipper! Go me! |
Then I hemmed by first turning up once and stitching on the machine, then up again and finished with a newly learned hand stitch, a narrow herringbone stitch!
Like
I said, I am so pleased with myself for sticking with it and being so
thorough with the fittings and constructions. I realized that it's
easier to put in all that time and effort when making a special occasion
dress like this, and maybe that's why I wasn't able to for my more
casual slow-sewing attempt last year of McCalls 6503.
And while I'm very pleased, it still came out a little less smoothed
than I hoped, and I fear that all the trying on and off for fit checks
made it look almost worn in (in a bad way) before it was even finished.
But now that I have the pattern all figured out, the next one will go
together much more easily and won't require all that extra fitting and
wear-and-tear during construction. After all this work on my Georgia
dress... I better make another!
Thursday, February 20, 2014
a little more georgia...
First of all, some exciting blog news: I REACHED 10,000 PAGE VIEWS TODAY! I still think it is so incredibly cool that people all over the world are interested in my sewing adventure. The sewing blogger community is just amazing, and I feel honored to be a part of it!
But moving on...
In response to a comment on my last post, I thought today I'd go a little bit more into how I went about troubleshooting my Georgia Dress bodice fitting troubles.
Here is my first attempt in a size 10:
I have a 36" bust, so I fall right in between the the US size 8 and 10. While the cups fit ok in shape and volume, the princess seams do not fall over the bust apex as they should, the side seam on the left is way too far back, and as you can see there is at least 4 extra inches of fabric on the right side seam. The size 8 really didn't look too much different, this time with more like 3 extra inches, even though according to the envelope the finished garment measurement is 35.5", that's 1/2" less than my actual bust measurement. Knowing that I needed to loose 2-3 inches, I decided to go right to the size 4 with a bust measurement of 33.5", 2" less than the size 8. I should mention that with these test garments, I have not taken in 5/8" seam allowance on the top and bottom, so the bodice when finished will actually be 1 1/4" smaller vertically. The size 4 pattern pieces looked very narrow, so to try to add a little more height to the neckline, and because my difference between high bust and full bust measurements is 2-3" (c-cup range), I did a 1/2" Full Bust Adjustment as recommended on the By Hand London Georgia Dress Sewalong.
But moving on...
In response to a comment on my last post, I thought today I'd go a little bit more into how I went about troubleshooting my Georgia Dress bodice fitting troubles.
Here is my first attempt in a size 10:
I have a 36" bust, so I fall right in between the the US size 8 and 10. While the cups fit ok in shape and volume, the princess seams do not fall over the bust apex as they should, the side seam on the left is way too far back, and as you can see there is at least 4 extra inches of fabric on the right side seam. The size 8 really didn't look too much different, this time with more like 3 extra inches, even though according to the envelope the finished garment measurement is 35.5", that's 1/2" less than my actual bust measurement. Knowing that I needed to loose 2-3 inches, I decided to go right to the size 4 with a bust measurement of 33.5", 2" less than the size 8. I should mention that with these test garments, I have not taken in 5/8" seam allowance on the top and bottom, so the bodice when finished will actually be 1 1/4" smaller vertically. The size 4 pattern pieces looked very narrow, so to try to add a little more height to the neckline, and because my difference between high bust and full bust measurements is 2-3" (c-cup range), I did a 1/2" Full Bust Adjustment as recommended on the By Hand London Georgia Dress Sewalong.
| On a side note: I was really surprised by how much I like this blue floral fabric as a bodice! Maybe a blue floral bra-top or bikini in my future? |
As you can see the fit is much better, and the neckline while still low is not too low after considering the 5/8" seam allowance. BUT I was seeing some sagging around the bust apex that I could not press out, a little easier to see in the second picture:
Of course I did my fitting without a t-shirt and cami underneath, and the sagging was even more prevalent without that tiny bid of added width from the extra shirts. Looking back to the By Hand London blog post on bodice fitting, it looked like the image demonstrating the need for a Small Bust Adjustment:
![]() |
| Image from http://byhandlondon.com/blogs/sew-alongs/12031569-georgia-dress-sewalong-3-full-small-bust-adjustments-fba-sba |
There was too much volume in that area of the bodice. So that's why I decided to try the size 4 without the FBA, obtaining a higher neckline by only using a 1/4" seam allowance on the top instead of the 5/8". It seemed to work!
| My black sateen from Mood.com sewed up beautifully, and pressed nicely to lay smooth over the shape of my bust. |
| I used my final muslin as the lining, and after all that leg work it came together perfectly! |
The instructions call for sewing the straps on both the front and back of the bodice by sandwiching them between the lining and main fabric. I opted to only attach the front at this point, knowing from experience that I will have to shorten the straps quite a bit once I'm able to try on the near-finished dress. At that point, I'll sew in the back of the strap by hand.
I hope to sew up a test garment for the skirt this afternoon, so expect an update soon!
Tuesday, February 18, 2014
georgia woes
I've got my pattern, got my fabric.... but no Georgia dress yet. Per the sewalong instructions, I made a muslin of the dress bodice, and while I'm glad I did... it's been quite the ordeal! I've made FOUR versions thus far!
I measure in between the US size 8 and 10, so for my first test I cut a 10. I used what I assume is a quilt cotton that I got from my mom's stash, that has a small amount of 2-way stretch, similar to my sateen. Once I got it on... it was like 4 inches too big! So I cut an 8 and still too big by 2-3 inches. This seemed odd, as the finished bust measurement given for size 8 on the envelope was smaller than my actual bust measurement!
Knowing that I needed to shave off a number on inches, I cut a size 4 next. The 4 would in no way be wide enough to cover my C-cup bust (WAY too much cleavage!), so I did a a 1/2" FBA as shown in the sewalong to try to add a little more height. The sizing worked both around and in bust height... except the shape of the cup was way off! So frustrated! How could I get the bodice to be snug enough around, yet high enough to cover my bust, and still have the shape of the cup lay smoothly?!?! So I went to bed.
Today, with fresh eyes, I tried again. I made a straight size four. (That's a finished bust measurement supposedly 2.5" less than my actual bust measurement..... makes no sense!) The cups laid nicely and the bodice was just right around. To add a little more height to the neckline, I've decided to sew the neckline with a 1/4" seam allowance instead of 5/8". I hope this will give me the coverage I'm looking for without sacrificing the fit. Now I'll have to be careful when grading out my size 4 bodice to the 8/10 waist and hips, and will probably do a test for that as well.
I signed up for this project to try to learn how to better fit for my body. To be honest, I don't feel like I've actually learned anything useful for fitting other garments in the future, except to keep trying different things until you get it right, even if what ends up right doesn't make any sense!
On a side note, don't you love that test fabric? Folded up on my fabric shelves, I would never have picked it for a garment! But once cut and sewn into a delicate fitted bodice like this, the floral really kinda shines! So I've decided to use my final test-garment for the lining of the dress, and have plenty more for something blue and floral on the outside in the future.
| Three of my four bodice test-garments. |
I measure in between the US size 8 and 10, so for my first test I cut a 10. I used what I assume is a quilt cotton that I got from my mom's stash, that has a small amount of 2-way stretch, similar to my sateen. Once I got it on... it was like 4 inches too big! So I cut an 8 and still too big by 2-3 inches. This seemed odd, as the finished bust measurement given for size 8 on the envelope was smaller than my actual bust measurement!
Knowing that I needed to shave off a number on inches, I cut a size 4 next. The 4 would in no way be wide enough to cover my C-cup bust (WAY too much cleavage!), so I did a a 1/2" FBA as shown in the sewalong to try to add a little more height. The sizing worked both around and in bust height... except the shape of the cup was way off! So frustrated! How could I get the bodice to be snug enough around, yet high enough to cover my bust, and still have the shape of the cup lay smoothly?!?! So I went to bed.
Today, with fresh eyes, I tried again. I made a straight size four. (That's a finished bust measurement supposedly 2.5" less than my actual bust measurement..... makes no sense!) The cups laid nicely and the bodice was just right around. To add a little more height to the neckline, I've decided to sew the neckline with a 1/4" seam allowance instead of 5/8". I hope this will give me the coverage I'm looking for without sacrificing the fit. Now I'll have to be careful when grading out my size 4 bodice to the 8/10 waist and hips, and will probably do a test for that as well.
I signed up for this project to try to learn how to better fit for my body. To be honest, I don't feel like I've actually learned anything useful for fitting other garments in the future, except to keep trying different things until you get it right, even if what ends up right doesn't make any sense!
On a side note, don't you love that test fabric? Folded up on my fabric shelves, I would never have picked it for a garment! But once cut and sewn into a delicate fitted bodice like this, the floral really kinda shines! So I've decided to use my final test-garment for the lining of the dress, and have plenty more for something blue and floral on the outside in the future.
Sunday, February 16, 2014
i made pants!
Hear that?
That's the sound of me crossing off another 2014 sewing goal! I made pants! Real pants! Wear-outside-the-house pants! And they fit!
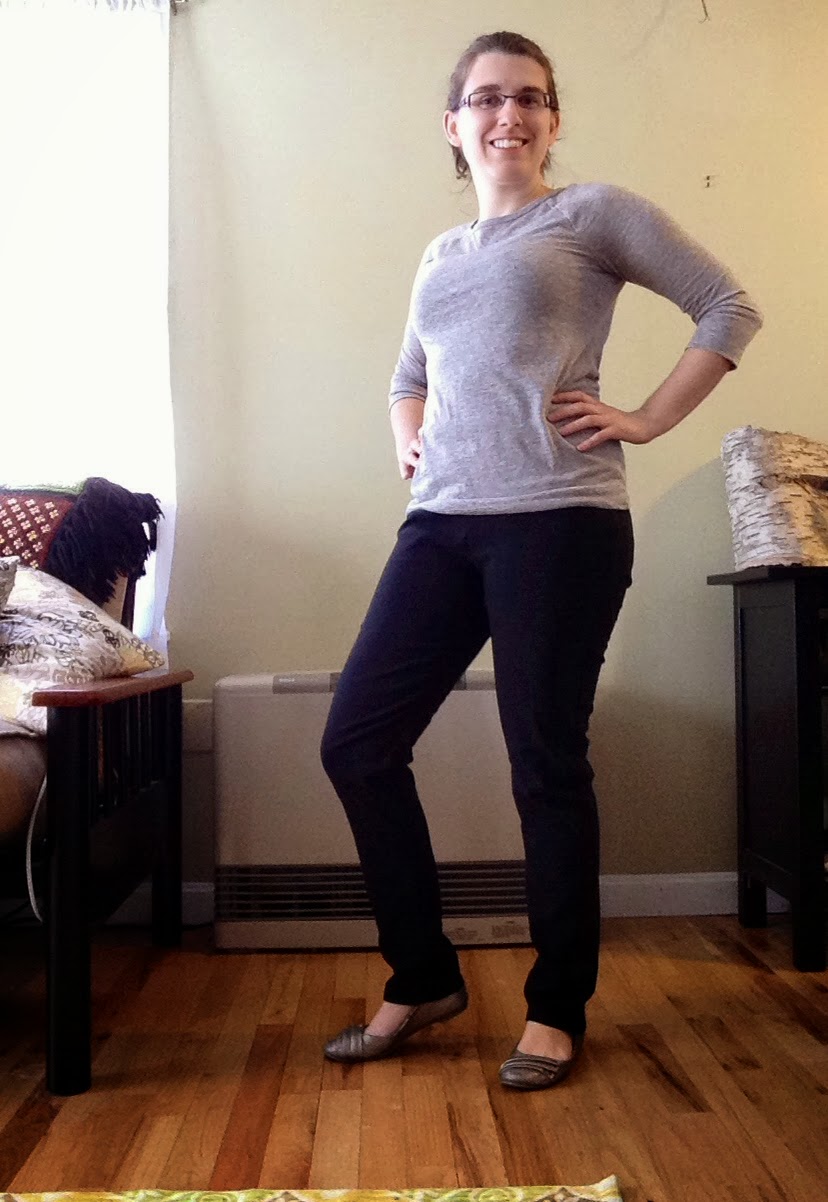
It's hard to evaluate and adjust the fit during construction, as you really can't get a feel for the fit until the waistband it on. Still, before adding the waistband I did adjust(scoop out) the crotch by about 1/4 inch, and lowered the front about 1.5 inches so that the waistband would lay perpendicular on my body, accommodating for my fuller bum. But once I had the waistband attached and I could really judge the fit, I'm not sure those adjustments were actually necessary.
That's the sound of me crossing off another 2014 sewing goal! I made pants! Real pants! Wear-outside-the-house pants! And they fit!
| And I got a self-timer app for my new iPhone! |
Per the suggestion of Gillian of Crafting a Rainbow, I used StyleARC's Elle Pants pattern. I even splurged to get a yard and a half of the suggested stretch bengaline fabric shipped over from Australia, to ensure the best possible conditions for pants-making success.
Gillian was right! The pants are super easy to sew up with just three pattern pieces, no fly, buttons, or pockets. Good thing too, because I found the accompanying instructions be be more than a little confusing. BUT, I will say that Chloe of StyleARC is quick and fabulous at responding to construction questions via e-mail!
She writes about Elle Pants: "This is the pant of the moment, slim line from ankle to waistline. Elastic
waist 35mm or 1 ¼ inch wide. These pants sit so beautifully without any
bulk, wear them with your high heels out for the night or with your
sneakers for brunch.....a must have piece in your wardrobe!"
It's hard to evaluate and adjust the fit during construction, as you really can't get a feel for the fit until the waistband it on. Still, before adding the waistband I did adjust(scoop out) the crotch by about 1/4 inch, and lowered the front about 1.5 inches so that the waistband would lay perpendicular on my body, accommodating for my fuller bum. But once I had the waistband attached and I could really judge the fit, I'm not sure those adjustments were actually necessary.
After attaching the waistband I was able to narrow the legs on the outside seam by about an inch from the top of the hip all the way down. I'm very pleased with how well the legs fit, and how easy the adjustment was! I also ended up only having to shorten the pants 2.5 inches!
Something very cool and thoughtful was how StyleARC includes little care tags with their fabric to add to your finished garment, just like RTW. No need to ruin your handmade garment because you forgot the fabric care!
Overall, I now have a great pants pattern the fits! While the instructions leave something to be desired... I enjoyed using the StyleARC pattern and will use them again (in fact, have another in the works currently!). The patterns are printed on nice, thick paper that will hold up to a lot of use, and I know if I ever have questions Chloe will respond promptly. The stretch bengaline was worth every penny. It sewed up very nicely with the right amount of weight, structure and stretch, making a great pair of stylish black pants for work! My one complaint is that they have that ever-so-slight snowpants sound when I walk. You know the sound I'm talking about... Now that I've made a successful pair maybe I can explore some other fabric choices that would preform the same, without the little annoying "swishy" sound.
Subscribe to:
Posts (Atom)

.jpg)