Showing posts with label Dressmaking. Show all posts

Wednesday, April 23, 2014

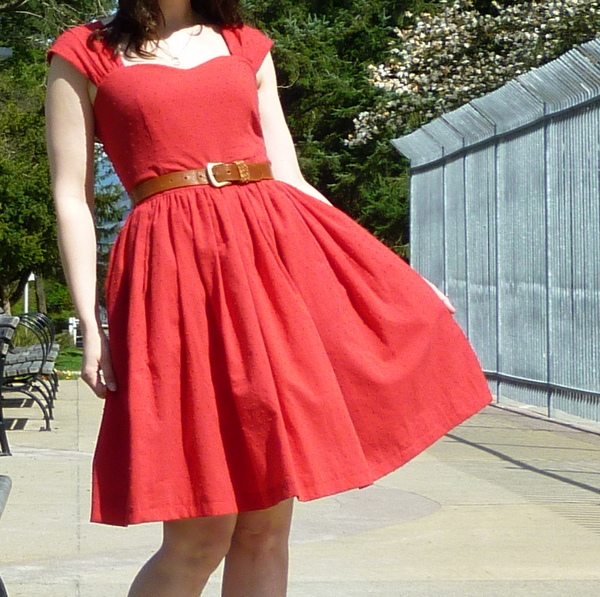
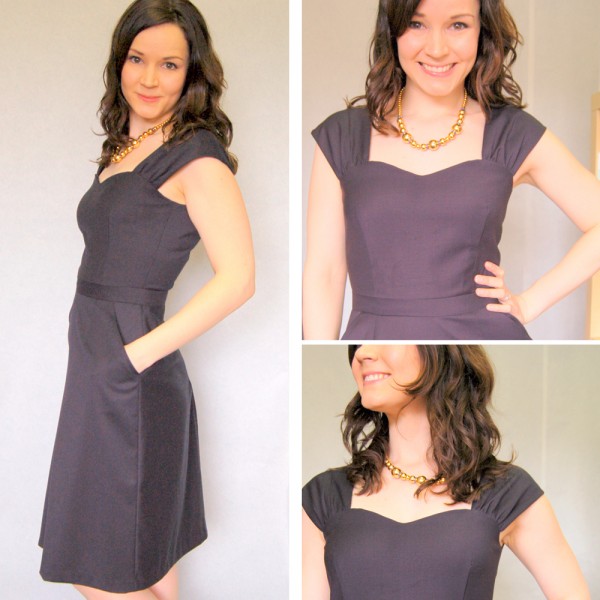
finished floral cambie


I wanted to go all out with fun heels and photos outside to show off my finished Sewaholic Cambie, especially since today is the day last day for Sew Dolly Clackett sew-along, but instead....


As soon as I was home from work... straight to the couch with a baggy sweatshirt and a box of popsicles. Yup, a springtime cold. No dolling up for this chick today. I still wanted to show you my finished Cambie, so here are some less-than-awesome, indoor, nighttime iPad pics... but I promise for modeled photos soon so we can talk fit!

Over all, I really enjoyed every part of making this dress. Floral cotton and pretty purple lining helps! But also Tasia drafted a very nice pattern. The bodice was easy to fit, and for me it was very helpful to attached the straps/sleeve to the bodice front last, as I often (and did here) need to take out extra at the shoulders. I opted for view A, with the A-line skirt and slash from pockets. I love slash pockets! I love how they sew together, and how they look on a garment, and I think they feel sturdier than other pocket constructions. Sewaholic patterns are drafted for a pear-shaped figure, which I am definitely not, so I could have graded down a couple of sizes at the hips if I wanted a more figure fitting skirt, but I didn't mind the extra volume in the skirt for this version.

That silk-like lining from my stash is very lightweight, and feels nice against the skin. I think this will make it very comfortable to wear. I'm pretty pleased with my matching at the waist when I installed my invisible zipper. I got it in on the first attempt! And without an invisible zipper foot for my sewing machine! The lining was then hand stitched to the zipper with a slip-stitch.


Can you see those teeny, tiny pricks along the hem? I didn't want to loose much length, so I serged my raw edge, folding up once and hand-stitching.


Sorry for the badly chipped nail polish...

I decided to try the rolled hem foot that came with my Bernina on the lining fabric. While not perfect here (and it's lining... so no one will see it....) I was pretty pleased! With a little practice that is going to be a very useful feature for fine fabrics!

Before I sign off, take some cold medicine and hit the sack for the night, I wanted to update you on my art studio's Kickstarter campaign.... and we did it!!! Thank you so much to those who helped with that! You have no idea how amazing this is... and how amazing it will be to be working in our new screen printing room. I've got some ideas for printing on fabric in the future... but that's another post for another time. :)

Saturday, April 5, 2014

what's rachel sewing today? a sewaholic cambie dress!

I'm finally feeling like sewing for spring! We've had, like, 4 above-freezeing days in a row! Some even with sunshine!!  So what's my first frock of spring (a term shamelessly stolen from Scruffy Badger)?  I've seen so many great Sewaholic Cambie Dresses around the web, and and for a long time now I've just have a hunch that it would be a great fitting pattern for me... so I've finally mustered up the courage to give it a try!


Oooo, floral cotton! I bought this fabric specifically with this dress in mind after seeing one of Tasia's versions here and her McCalls 7743 here.  The bodice came together very easily, and with very few adjustments. What a great patterns! I took it up at the shoulder seam by 5/8", and then shortened the bodice 1/2" before attaching the waistband. The cap sleeve is attached to the back bodice, then sewn into the front bodice once everything in constructed and fitting. I often have to short the shoulders once I have a dress fitted, so this is perfect for me! I can wait until the very last step with the zipper installed and all to fit my sleeves!

The pattern is completely lined. In the instructions it calls for you sew the entire dress and lining seperatly, then after the zipper is installed attached them at the top, right sides together then turning inside out for a clean finished. I've altered that construction just slightly so that the waistband and  lining would be stitched together for a little more stability.  I hope it doesn't mess me up down the line.

You can see how I have sewn all layers of bodice, lining and waistbands into the waistband.

But I didn't sew them together all the way to the back seam to allow me in install the invisible zipper later, after the skirt is attached. Then I will hand sew any remaining lining closed to cover all the yucky seams.
Now I need to decided on the skirt. The pattern includes a full gathered skirt (which doesn't always look flattering over my abdomen, but looks so cute with this bodice on Tasia!) and a narrow, classic A-line (more practical for day-to day maybe? But will that style look good on my figure?). Another option would be to draft a circle skirt, which I know looks great on me, but would be a lot more work, and I hate hemming a circle skirt!


Hmmmmm, what will look best... and what will work best in my wardrobe?


Thursday, February 20, 2014

a little more georgia...

First of all, some exciting blog news: I REACHED 10,000 PAGE VIEWS TODAY! I still think it is so incredibly cool that people all over the world are interested in my sewing adventure. The sewing blogger community is just amazing, and I feel honored to be a part of it!

But moving on...

In response to a comment on my last post, I thought today I'd go a little bit more into how I went about troubleshooting my Georgia Dress bodice fitting troubles.

Here is my first attempt in a size 10:

I have a 36" bust, so I fall right in between the the US size 8 and 10. While the cups fit ok in shape and volume, the princess seams do not fall over the bust apex as they should, the side seam on the left is way too far back, and as you can see there is at least 4 extra inches of fabric on the right side seam. The size 8 really didn't look too much different, this time with more like 3 extra inches, even though according to the envelope the finished garment measurement is 35.5", that's 1/2" less than my actual bust measurement. Knowing that I needed to loose 2-3 inches, I decided to go right to the size 4 with a bust measurement of 33.5", 2" less than the size 8. I should mention that with these test garments, I have not taken in 5/8" seam allowance on the top and bottom, so the bodice when finished will actually be 1 1/4" smaller vertically. The size 4 pattern pieces looked very narrow, so to try to add a little more height to the neckline, and because my difference between high bust and full bust measurements is 2-3" (c-cup range), I did a 1/2" Full Bust Adjustment as recommended on the By Hand London Georgia Dress Sewalong.
On a side note: I was really surprised by how much I like this blue floral fabric as a bodice! Maybe a blue floral bra-top or bikini in my future?

As you can see the fit is much better, and the neckline while still low is not too low after considering the 5/8" seam allowance.  BUT I was seeing some sagging around the bust apex that I could not press out, a little easier to see in the second picture:


Of course I did my fitting without a t-shirt and cami underneath, and the sagging was even more prevalent without that tiny bid of added width from the extra shirts. Looking back to the By Hand London blog post on bodice fitting, it looked like the image demonstrating the need for a Small Bust Adjustment:

georgia dress sewalong - fba & sba - by hand london
Image from http://byhandlondon.com/blogs/sew-alongs/12031569-georgia-dress-sewalong-3-full-small-bust-adjustments-fba-sba

There was too much volume in that area of the bodice. So that's why I decided to try the size 4 without the FBA, obtaining a higher neckline by only using a 1/4" seam allowance on the top instead of the 5/8". It seemed to work! 

My black sateen from Mood.com sewed up beautifully, and pressed nicely to lay smooth over the shape of my bust.

I used my final muslin as the lining, and after all that leg work it came together perfectly!

The instructions call for sewing the straps on both the front and back of the bodice by sandwiching them between the lining and main fabric. I opted to only attach the front at this point, knowing from experience that I will have to shorten the straps quite a bit once I'm able to try on the near-finished dress. At that point, I'll sew in the back of the strap by hand. 

I hope to sew up a test garment for the skirt this afternoon, so expect an update soon!


Tuesday, February 18, 2014

georgia woes

I've got my pattern, got my fabric....  but no Georgia dress yet.  Per the sewalong instructions, I made a muslin of the dress bodice, and while I'm glad I did... it's been quite the ordeal! I've made FOUR versions thus far!

Three of my four bodice test-garments.

I measure in between the US size 8 and 10, so for my first test I cut a 10. I used what I assume is a quilt cotton that I got from my mom's stash, that has a small amount of 2-way stretch, similar to my sateen. Once I got it on... it was like 4 inches too big! So I cut an 8 and still too big by 2-3 inches. This seemed odd, as the finished bust measurement given for size 8 on the envelope was smaller than my actual bust measurement!

Knowing that I needed to shave off a number on inches, I cut a size 4 next. The 4 would in no way be wide enough to cover my C-cup bust (WAY too much cleavage!), so I did a a 1/2" FBA as shown in the sewalong to try to add a little more height. The sizing worked both around and in bust height... except the shape of the cup was way off! So frustrated! How could I get the bodice to be snug enough around, yet high enough to cover my bust, and still have the shape of the cup lay smoothly?!?! So I went to bed.

Today, with fresh eyes, I tried again. I made a straight size four.  (That's a finished bust measurement supposedly 2.5" less than my actual bust measurement..... makes no sense!) The cups laid nicely and the bodice was just right around. To add a little more height to the neckline, I've decided to sew the neckline with a 1/4" seam allowance instead of 5/8". I hope this will give me the coverage I'm looking for without sacrificing the fit. Now I'll have to be careful when grading out my size 4 bodice to the 8/10 waist and hips, and will probably do a test for that as well.

I signed up for this project to try to learn how to better fit for my body. To be honest, I don't feel like I've actually learned anything useful for fitting other garments in the future, except to keep trying different things until you get it right, even if what ends up right doesn't make any sense!

On a side note, don't you love that test fabric? Folded up on my fabric shelves, I would never have picked it for a garment! But once cut and sewn into a delicate fitted bodice like this, the floral really kinda shines! So I've decided to use my final test-garment for the lining of the dress, and have plenty more for something blue and floral on the outside in the future.

Sunday, January 19, 2014

not-a-christmas-party dress


My MIL every year hosts a big annual Christmas party. It's a perfect excuse to get dressed up on a small island in Maine, and each year there are about 70 guests eating and enjoying each other's company in her home. Last year due to some kitchen construction, her Christmas party was postponed until January... and everyone loved it so much more after the holidays that now it's the annual Not-A-Christmas Party! Of course after this past year of sewing and blogging... I had to make a fabulous party dress.


The pictures were taken at the end of the party after the quests had all left, so it's probably a smidge wrinkled. I used some very cool, large scale "Yokohama Forest" quilting cotton  by Alexander Henry. The fabric was nice and thick, and both washed and pressed beautifully. Isn't is sometimes nice to sew with plain, old, cotton? Because of the large scale of the print, I spent a lot of time decided what would be the best placement of said print on my body. That also meant very careful cutting to get the pattern to line up perfectly across the seams. I ended up having to fussy-cut the sleeves from single layer from the scraps left after cutting the bodice, and was just able to lay them out so they would also match up. Totally worth it!

I used an out-of-print Butterick pattern (the number escapes me currently so I will find out when I'm back home, but something along the lines of this McCalls pattern), for a simple shift dress with back darts, french bust darts, and scoop neckline. Only three pattern pieces! Perfect for highlighting my fabric!

For adjustments I shortened the pieces just below the bust line, between the waist and hips, and then a few inches more when I did the hem. Even though I measure at a pattern size 14, I looked at the finished garment measurements and decided to cut a 10 for the shoulders, bust and waist, then grade out to a 14 in the hips (which seemed a little odd as I don't really consider myself pear shaped). By cutting the 10, the shoulders fit perfectly with no further alterations, a rare occurrence! I had to fuss with the shape of the side seams in the hips a few times to get that to lay right. It's still not quite perfect, but very close. I ended up re-drafting the whole sleeve to a straighter line for a looser fit.


On the back, I decided to try a trend and put in a gold exposed zipper! (Can you believe the retail price on that thing was almost $20! Good thing I had a nice coupon.... it was worth it.) The zipper was originally about 8" longer and ended below my bum... not cute. Traditionally I would shorten it from the bottom, but I wanted to preserve that neat finish that already came with the zipper. So I shortened from the top, tucking the end in between the lining fabric and creating a zipper-stop with superglue! (Probably not the approved technique in Vogue's New Book for Better Sewing...)

I didn't quite get the zipper perfectly straight with the neckline... but it's barely noticeable.


Notice the flecks of metallic gold and splashes of vibrant purple in the fabric!

I lined the bodice with some vibrant purple fabric from my stash that matched the purple in the cotton print. It's probably a synthetic, but has a matte sheen and weight similar to a silk blouse I own and love. Made a lovely lining! I finished the hem by hand. The sleeves were unlined and finished on the serger. Speaking of sleeves, they took forever to set in! I've been spoiled by knits that can be stretched into place. It's probably good for me to be forced to re-learn to set sleeves in woven fabric, as I'll need to know that later this year when I make my coat!


The verdict? The dress was very comfortable all evening! Even after lots of food and dessert! I also wore my Ginger high-waist panties for the first time, and they were also very comfortable! So far all my 2014 garments have been great successes and additions to my wardrobe. As an artist, this is a perfect cocktail dress for any functions or events I would be attending, and it will get a lot of use!


Monday, November 11, 2013

what to do with wool?

You know how sometimes you buy a piece of fabric that you love so much that you just can't decided what to do with it? I've got that right now, and could use a little guidance.

I have this super soft, lovely, wool blend. It's fairly lightweight, like a densely woven but thin flannel.


I LOVE IT! And I want to wear it this season. But because I love it so much, and paid a little bit more than i usually do, I'm feeling all this internal pressure to make something that I will not only love as much, but will get regular wear in my wardrobe.

My first thought was a high waist circle skirt, to just below the knee. It would have a vintage vibe that could be dressed up, but would it be too dressy for everyday? Sometimes you just don't know until you intruduce it into your wardrobe!  I would pattern it off this dressy Modcloth.com skirt that I own and love for fall special occasions:


http://www.modcloth.com/shop/skirts/songs-by-the-fire-skirt
Worried that it might be too dressy for real life (although, maybe I could tottally rock it day to day.... I don't know!), I thought, "what about a midi A-line? Or one with a smidge of flair? Or knee-length slim skirt?"

 
Slim or A-line? I used this pattern for my slim, lace print skirt.

Maybe view C?


But then I started to think about a cozy, casual top for fall/winter. The weight could be perfect for a flannal-type button-up. I've never made a button-up blouse before, so that's a little intimidating. Would it be tricky to fit to my petite frame? Maybe this fabric would be light enough for Butterick 5826, which I previously made in a lightweight rayon that fit fabulous with very little alterations!


And then I started thinking about my new navy knit dress and how much I love to wear it with tights. Maybe I should make a cozy dress to wear with tights! I know, your thinking, "but look at all the trouble your having with your grey dress." Should I really start another dress? I may not have it finished until spring OR may run into the same frustrating fit issues! But how cute would these dressed be in cozy purple wool?


Look! "VERY EASY" It can't be that bad...


Maybe I could use the same pattern that I drafted for this three-hour dress, already altered and fitting?
So, really, what should I do with my wool? HELP!


Wednesday, October 23, 2013

fast sewing & slow sewing

First off... NO ONE ENTERED MY GIVEAWAY!  :(  A friend mentioned that maybe all of you readers were sewing admirers, but not sewists yourself. That got me wondering... how many of my readers sew? Let me know below if you'd care to share. And now... on to the sewing!

First: fast sewing!

This week I was making a costume for a friend that was totally kicking my butt! It was an easy design, but I was going without a pattern and using these awful-to-sew-with costume fabrics; slippery metallics and inexpensive sheers. I needed a quick sewing pick-me-up after that!


Enter the slouchy, lacy t-shirt! Kimono sleeves, simple banded cuff and neck binding, 4 pattern pieces and 11 total lines of stitching, mostly done on my serger. It took me about a hour from start to finish, a perfect palette cleanser after the gold and sheer orange monstrosity! (Which actually came out just fine and my friend was super pleased....)


I used New Look 6216, view B with the cuffed sleeve for a little extra length. I forget how much I like New Look patterns. They always seem to have simple, stylish designs that are easy to make your own, and are always affordable. 


This was my first time installing a narrow band for the neckline on the serger (and probably only my 2nd or 3rd time doing this finish on any machine!). I didn't do a great job. The band width ended up very uneven, but It was a good learning experience and doesn't bother me enough to not wear the shirt. I also made the pattern size I measure at, which is actually a size or two bigger than what I usually make, so it's nice and slouchy! For solid, everyday t-shirts I'd make a smaller size. 

Now the slow sewing...


Inspired by a pin on pinterest.com, I'm making McCalls 6503, view D in a woven, grey, linen-like fabric (not sure the fabric content, probably a synthetic or synthetic blend) that I picked up for free from my mom's stash! I got the pattern on sale at Joann Fabrics and only had to buy thread, buttons, and a zipper, so the whole dress is costing me under $6! On this project I'm really taking my time to practice good technique; hand basting the placket, pressing each step, finishing every seam. So far I have most of the bodice constructed and it's looking very nice! Setting sleeves will take a little time because I have very narrow shoulders, but I'm giving myself that time to pay close attention, working on it a hour or two at a time.

AND let myself take a break from this dress to whip out a fast project whenever I have the need to make something quick!


Wednesday, October 16, 2013

a three-hour dress


I had originally bought this mid-weight sweater knit fabric for... well exactly that; a sweater! But as I've been discovering more and more about my own personal style through sewing, I realized that a blue and while heart print cardigan just didn't fit into my wardrobe. When I found this image on pinterest.com, I knew exactly what that fabric needed to be:
Fall love
image from queenofoz.blogspot.com
I started with this Simplicity Sew Simple pattern I picked up for $.97, and I say started with because the end result was much different!


I made a wearable-muslin-of-sorts of this pattern straight from the envelope for my Halloween bee costume, since a costume doesn't have to bee a perfect fit. (Get it? I'm so funny!) It's a simple pullover dress, front piece cut on the fold with bust darts, back piece has two pieces with a slight flare on the back center seam. Trying that on I was able to figure out what kind of alterations I wanted to do to my paper pattern for the blue and white heart dress:


I folded up an inch between the bust and arm opening (and the same to the back pattern piece), taking care of my petite bodice and high bust-point in one swoop! Then I threw (swung? whatever the term is...) the bust dart so that in angled towards my waist for a little more waist definition. 


The original pattern came with little short sleeves, so I lengthened them to hit just as my elbow and added and little cuff/slit/I don't quite know what you call it. 

You can't quite see it, but there are two perfect back darts!
I took in a little more than an inch from the center back, which also straightened the center seam so I could cut the back on the fold and eliminate the back center seam. After stitching up the side seams I decided to add some back darts, too, for just a little more shape. I just stole those right off another dress pattern in my stash! And to finish it all off, I made facings for the neckline instead of a narrow hem or band.

It felt so good to put into practice these flat pattern altering techniques I'd picked up in places like the Sew the Perfect Fit with Lynda Maynard class I took on Craftsy.com, and the A Perfect Fit book!  I'm pretty pleased with myself! I feel a little like Carolyn from Diary of a Sewing Fanatic, who can slash and alter her TNT dress pattern into pretty much anything she can think of!

I used my sewing machine with a slight zig-zag stitch for darts, sleeve construction and setting, sewing in the neckline facings, and top-stitching on the neckline and hem, then used my serger for the side seams, finishing the armhole seams and neckline facing, and finishing the raw edge on the bottom hem so that I only had to fold up and stitch once, reducing bulk. The coolest part? From the time I started pattern alterations to finished garment took only about three hours! I got to wear it out that evening with leggings and boots... super cute. There may be more of these dresses in my future!